
(cet article existe également en français)
Somewhat frustrated by the relatively simple visuals of Mana Fortress last year, I wanted to create a more complex scene, mixing sprites and generated graphics.
I thought of a better way to generate a layout without computing an explicit grid, hopefully freeing enough space for a more interesting scene.
Since Revision happened early April, I also wanted to avoid the coding rush of last year by starting earlier.
In the end I worked on the intro for about a month (end of February -> start of April), and made the last decisions hours before the deadline, as usual :)
Also as usual, since I’m largely on the sorcerer side of programming, I ended up with something completely different from what I had in mind initially :)
~
The intro and its source is available here and on pouët.net, it needs DOSBox with “cycles=60000” configured (and a CPU powerful enough) to run it properly.
The source code is also available here.
Inspiration
My original idea was to create a scene combining one or two simple sprites with procedurally generated effects.
I searched my old deviantArt favorites and found some great pixel art depicting quartz and rocks floating into space :
- https://www.deviantart.com/pauriva/art/Pixeltober-10-2020-858135260
- https://www.deviantart.com/pauriva/art/Pixeltober-9-2020-857596080
- https://www.deviantart.com/314erry/art/Neutron-Star-849886516
I thought about rendering floating rocks (with sprites) on a space background (with code), or quartz blocks on a field.
~
I also studied scenes from Chrono Trigger and Secret of Mana (did I mention I liked SNES RPGs ?), notably the ground, quartz, and waterfalls :
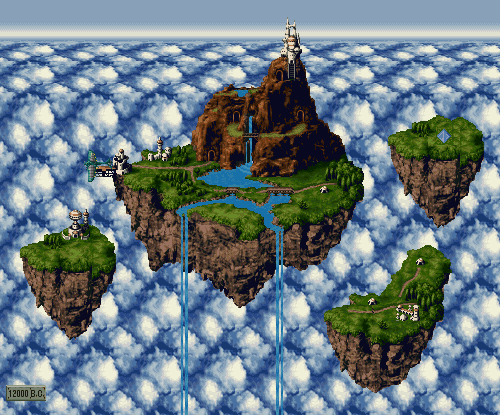
Kingdom of Zeal, from Chrono Trigger
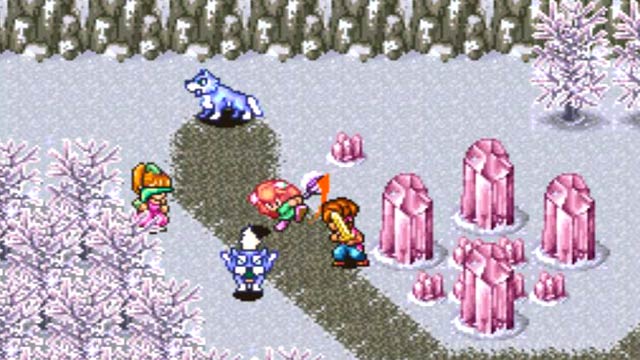
Ice Country, from Secret of Mana
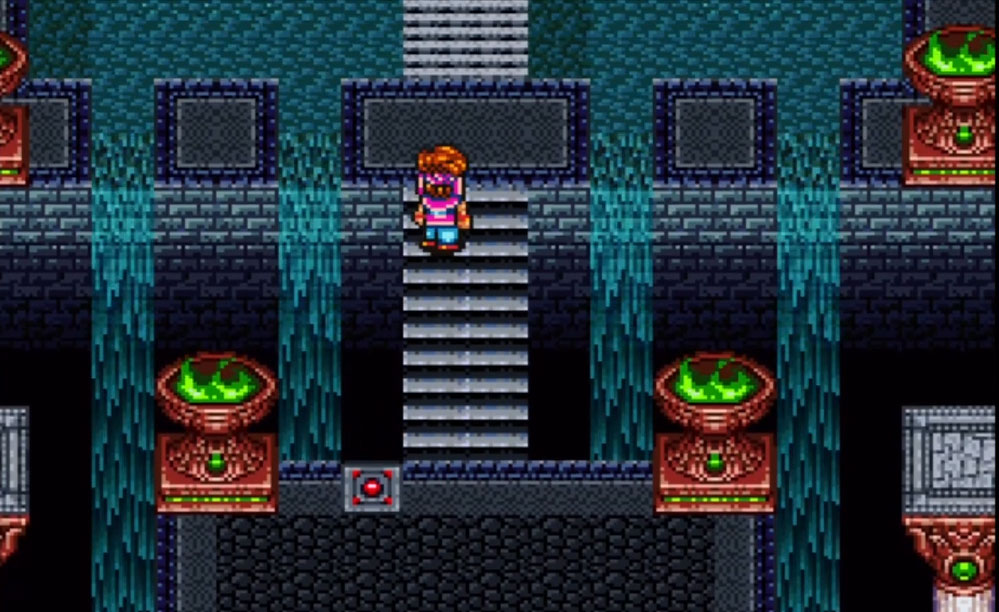
Water Palace, from Secret of Mana
I noticed the waterfall pattern in SoM was relatively simple (only two 16x16 sprites) and created a nice flow effect when moving :
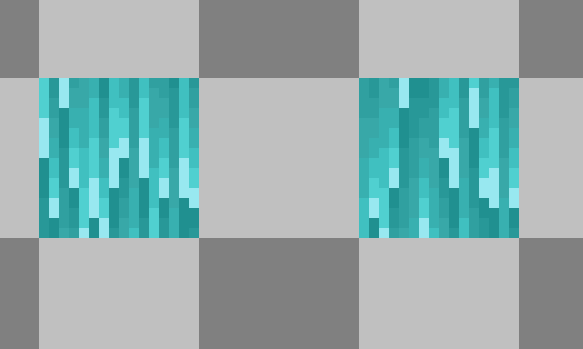
So at this point my plan was to :
- try to implement a better tiling system,
- create a waterfall-like effect like the above in code (instead of using a sprite),
- see if I could add some sprites to complement it.
Tiling system (again)
Unlike my previous intro, I wanted to try a different tiling system that does not rely on computing a “tile ID” and a 0-255 pixel index for each 16x16 tile.
For some reason I directly implemented the Rrrola’s trick, which computes an approximated X and exact Y screen coordinates from the screen pointer DI :
mov ax, 0xCCCD ; rrrola constant
mul di         ; multiply this constant with screen pointer (0-64 000)
; DL : approximated X screen coordinate (0-255)
; DH : Y screen coordinate (0-200)
This code uses only 5 bytes (3 for the constant, 2 for the MUL), compared to the classical way used in Mana Fortress, which uses 9 bytes :
mov ax, di ; copy screen pointer into AX
mov bx, 320
xor dx, dx
div bx ; divide the screen pointer stored in AX by 320
; DX : X screen coordinate (0 - 320)
; AX : Y screen coordinate (0 - 200)
There is only a ‘small’ problem : we use a resolution of 320x200 ; since X is approximated from 320 to 255 pixels, some X values will be wrong. So it would be impossible to render a sprite properly, but I didn’t figured that out at the time :)
Tile coordinates
To compute the X/Y coordinates local to each tile, we can use the fact that a logical AND is the same as a modulo, as long as the divisor is a power of two :
; example here with 8x8 pixels tiles

mov al, dl ; get screen X coordinate into AL
and al, 0x07 ; compute X % 8 : x = [0-7]

; y % 8 : [0 - 7]
mov bl, dh ; get screen Y coordinate into BL
and bl, 0x07 ; compute Y % 8 : y = [0-7]

shl bl, 3 ; bit-shift left 3 times (i.e. multiply Y by 8), since each row is 8 pixels
add al, bl ; add Y to X

; generates a 8x8 tile with indices ranging from 0 to 63
Instead of using DIV to compute a modulo like my previous intros :
mov al, dl ; get screen X coordinate into AL
mov bl, 8
xor dx, dx
dix bx ; divide X by 8 and get the remainder in DX
This saved a lot of bytes compared to my previous intro, which used far too many DIV.
Waterfall ?
With the tiling system done, I tried to create a waterfall-like effect, and failed :
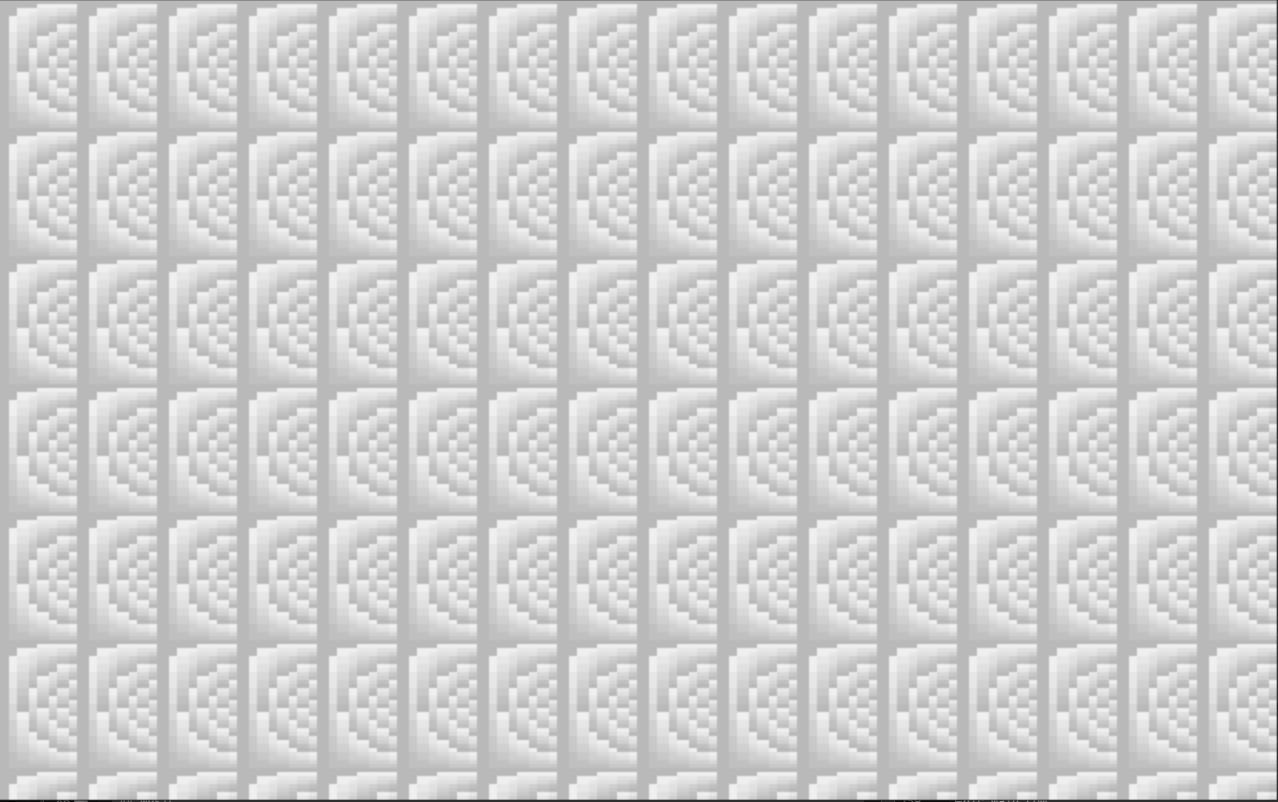
Pseudo-random noise looked ugly, and I failed computing a gradient that looked convincing enough. I still didn’t want to use a sprite, since it would consume too much size to add something interesting after that.
Dark portal
I tried playing with the coordinates, different colors, adding symetry, until I stumbled upon this :
Not quite a water-like effect, but I tried reverting it to create a portal-like effect in the top-half part of the screen :
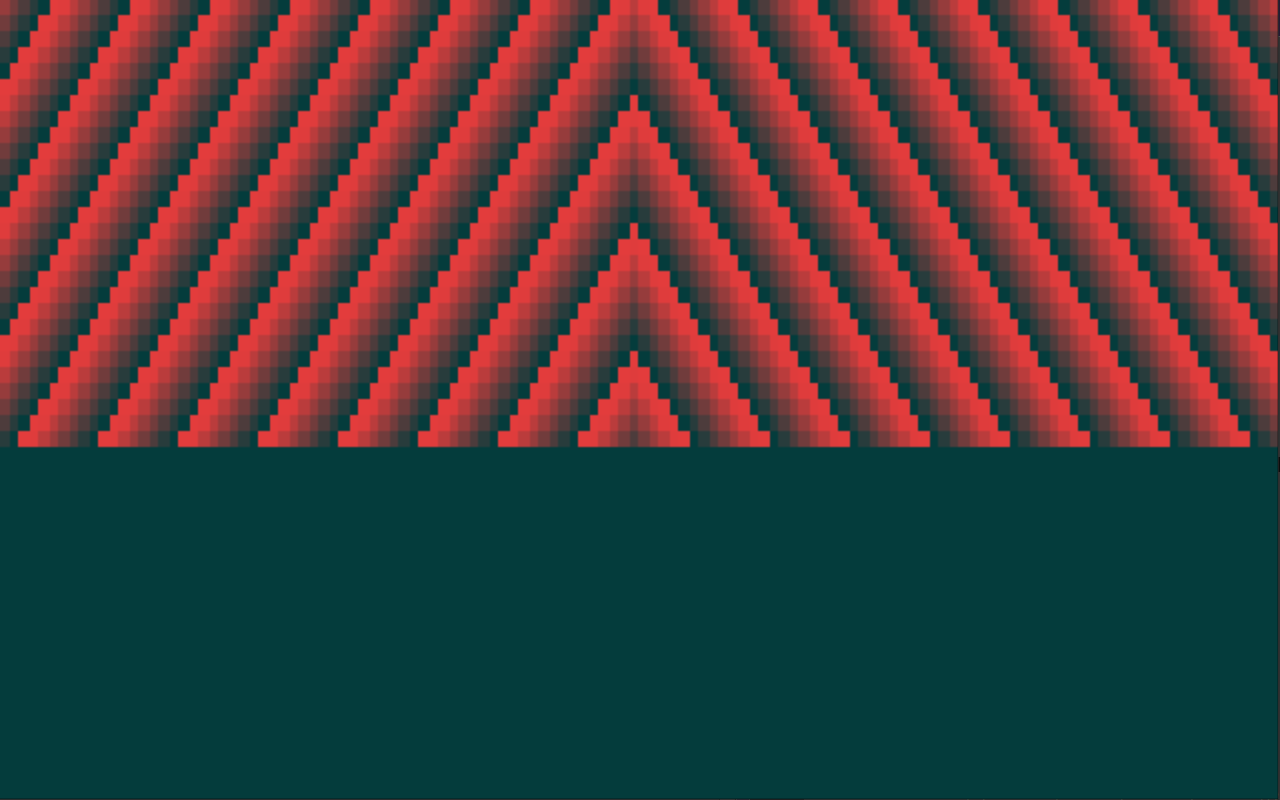
At this point I thought I could add something like a bridge to the bottom half to complement the effect, inspired by The Maw of Darkness by Julian Faylona.
However I couldn’t find quickly anything good enough to add, and the top/bottom transition was too harsh, so I kept trying other variations.
Bubbles
I tried computing a distance function from the center (i.e. creating a circle using the FPU), and adding it to the color computation for each pixel in a tile.
This ended up creating some interesting gradients :
Then bubble-like patterns :
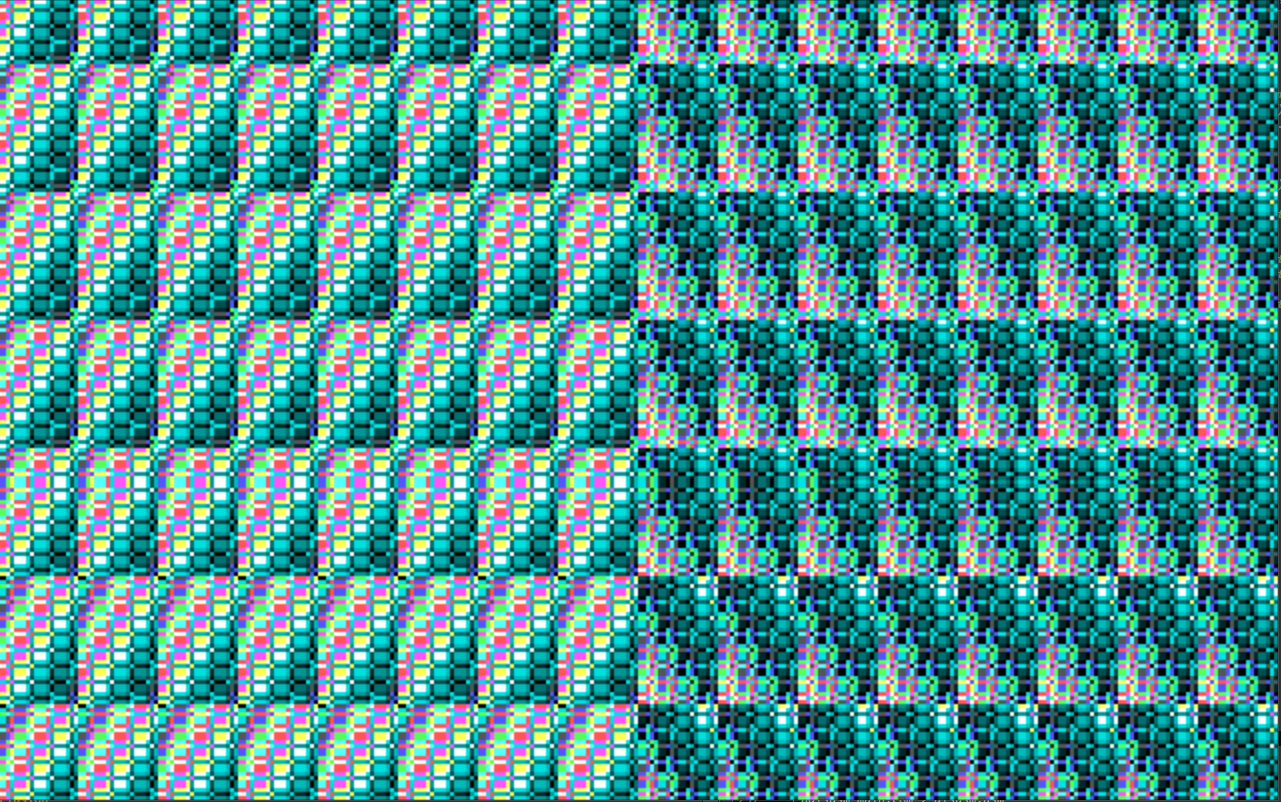
Then finally this not-completely-symmetrical pattern with better colors :
… which kinda looked like a waterfall, I guess ? :’)
More experiments
Since the previous effect only had a screen-wide horizontal symmetry, I tried adding a vertical one, then tested all gradient variations, intending to keep one frame as a static scene :
At this point I noted that my current palette had an off-by-one bug, a mistake I already made when coding the palette for Hellgate :

The palette used 16 colors, since the tiles were 16x32 pixels, divided into two identical gradients of 8 colors each.
So the black should have been in the 8th and 16th position, instead of the 7th and 14th. And much like Hellgate, this created interesting patterns, so I kept it that way.
~
At this point, the effect was relatively interesting, and the intro used ~150 bytes, so plenty of bytes left ; I thought I could use this effect as a background, then add a sprite on top of it.
Cycling through all variations, I thought about using this one, which created a nice organic effect :
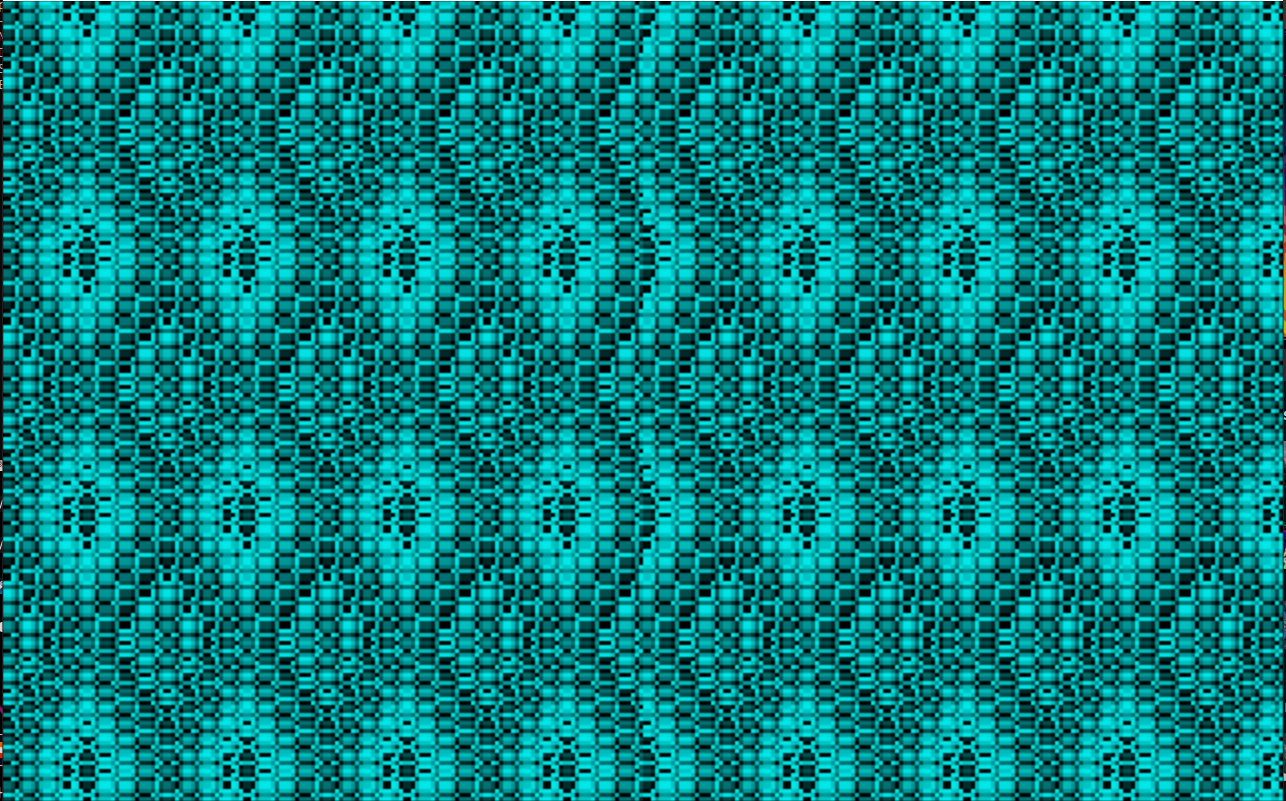
At this point I realized the Rrrola’s trick approximation created this “strange” discontinuity in the middle of the screen, and this would likely prevent me to display a sprite correctly by ruining the pixel computations.
I tried swapping the code with the exact division instead, but it ended up ruining the effect altogether.
Tweaking the palette
Realizing I could probably not use sprites, I tried creating a more interesting background by using a full 256 colors palette with gradients, instead of the 16-colors teal version.
This could be used to apply different 16-colors patterns depending on the position of the screen, and time.
I spent some time trying to come up with interesting colors, failed multiple times to generate the intented palette, and many experimentations/headaches later ended up on this :
mov dx, 0x3c8 ;
xor ax, ax ; start at color 0
out dx, al ; select palette colors
inc dx

mov ax, 58 ; starts AX at 58
push ax ; save AX value for later
xor bp, bp ; use BP as the iteration counter (0 -> 255)

color:
	out dx, al ; output red

	mov bx, bp ; copy BP into BX
	shr bx, 4 ; divide BX by 16
	shl bx, 2 ; multiply BX by 4
	sub ax, bx ; subtract AX with BX

	; if AX is now negative : set G & B to 0 instead of overflowing
	jns next2
		xor ax, ax ; AX = 0
	next2:

	out dx, al ; output green
	out dx, al ; output blue

	pop ax
	sub ax, 9 ; remove 9 from AX
	and ax, 0x3F ; compute AX modulo 63, since 63 is the maximum possible color index
	push ax ; save AX for next iteration

	inc bp
loop color ; loop until all 256 colors are set
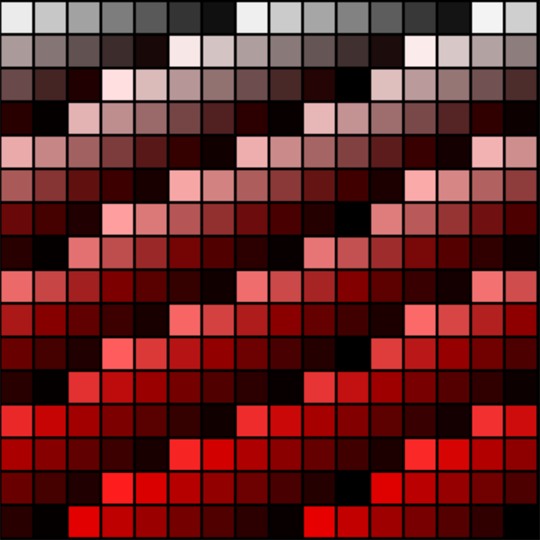
This produces with a white to black gradient, which progress into a red to black one later in the palette :
Blood wave
I replaced the teal palette in the original effect by this new one, applying the gradient by adding a palette offset depending on elapsed time and the position of the screen, creating this :
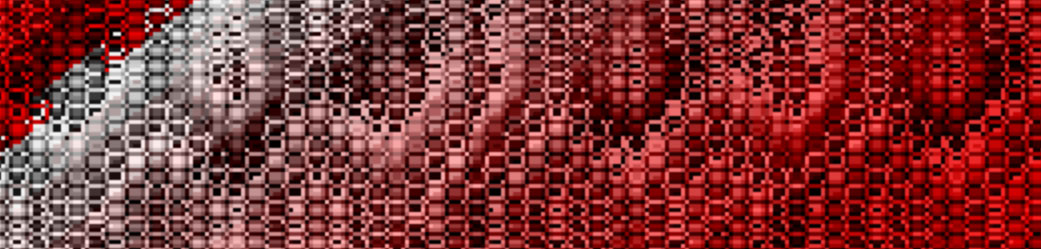
I immediately loved the combination of the quasi-organic effect of the bubbles, the ‘boiling’ effect created by the animation, and the red/white transition creating a nice contrast accross the screen.
As each pixel has a different color, this is an example where running the intro on DOSBox will display much better graphics, since the video compression tends to blur all these little details.
I tried to find the best variation by changing the symmetry or the palette computation :
- First test, with an horizontal scrolling :
- Diagonal scrolling from top/left to bottom/right corner (my favorite) :
- Inverted diagonal scrolling and colors. I also liked it, but it would probably look better with a slower speed, or as a static scene :
- Changing a single multiplication by 8 to 4 :
This last one created a cool horror-like organic effect, but I did not have any idea how to improve upon it, so I kept my favorite.
Underwater scene
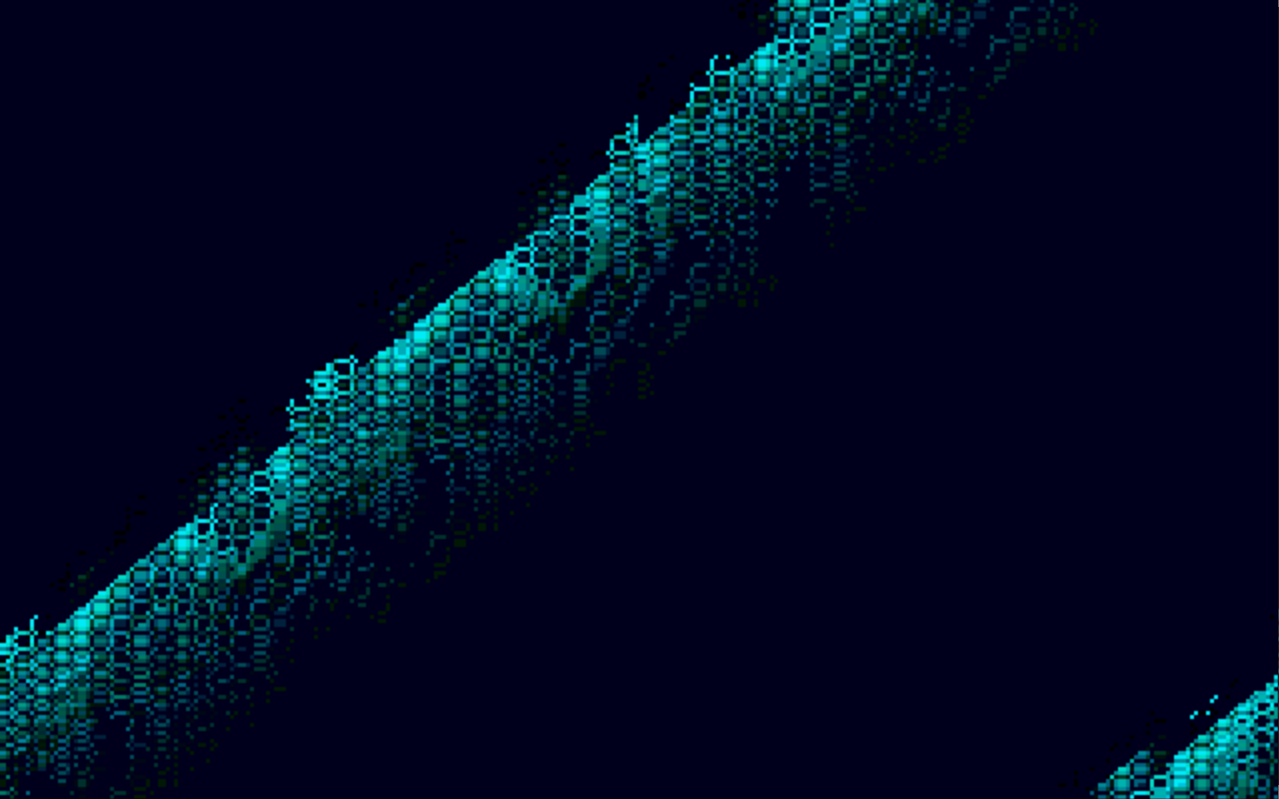
Of course I also tried to tweak the palette itself, by removing the red component and using the gradient for the green + blue components instead :
This created a nice water-like wave effect, at least for me ; others have seen a more vegetal/alien thing :
To improve the underwater effect, I added a blue layer by XOR-ing the blue component, leading to this palette :
color:
	xor ax, ax ; => set the red to 0 in all cases
	out dx, al ; output red

	pop ax ; => get back the gradient value earlier than the white/red palette
	mov bx, bp
	sub ax, bx ; => subtract the iteration counter

	jns next2
		xor ax, ax ; => prevent green & blue from underflowing
	next2:

	out dx, al ; output green

	xor al, 0x09 ; => XOR the green with some constant
	out dx, al ; output blue

	pop ax
	sub ax, 9
	and ax, 0x3F
	push ax
	push ax

	inc bp
loop color
Resulting in this :
Combining the two scenes
The first scene (the white/red one) used 171 bytes after an optimization pass, but I also liked the second scene, so I searched a way to combine the two scenes with a smooth color transition between both.
There was multiple issues though :
- the second scene used a different palette (obviously),
- the ‘wave’ diagonal bar moved in the inverse direction : bottom-right corner to the top-left one,
- the ‘bubbles’ creating the water effect also moved in the inverse direction,
- the ‘wave’ diagonal bar was thinner than the other scene.
I knew I could not fix all of these : abruptly changing the direction of the wave would create a weird effect.
Instead I focused on the colors, put the two palettes code side-by-side and tried to switch between them gradually.
I knew it would be hard, but after many trials and errors, I finally found a way :
The transition created new interesting color combinations, so I slowed it to be a little longer, since the maximum display time for 256b intros at Revision is ~1 minute.
Then I adjusted the ‘wave’ bar so the green/blue starts thinner, then widen over time :
I could not find a way to alternate the scrolling from bottom->top to top->bottom, so I kept the one that looked better for the white/red palette.
So the blue/green effect at the start scrolls “backwards” compared to the stand-alone version.
At ~215 bytes, I was completely satisfied by the graphics, only a familiar problem remained … no sound :)
Music
Adding sound was as painful as the previous year : not much time left, not much bytes left for an interesting pattern.
However I had a nice visual transition this time, so I decided to try and reuse the same registers both for the graphics and the sound.
Much like my previous intro, I stored the MIDI commands at the end of the code :
music:
	db 0x3F ; UART mode
    db 0x99 ; NOTE ON on channel 9
	db 44 ; note
	db 80 ; volume
    db 0xc0 ; change instrument on channel 0
	db 101 ; instrument
	db 0x90 ; NOTE ON on channel 0
    db 35 ; note
	db 80 ; volume
Then updated the overall volume every frame, with the same register used to progressively change the colors (i.e. adding more red and removing green and blue) :
; progressively augment drum volume
mov [si - 6], byte bl

; brighten red
mov al, 64
sub al, bl ; 64 -> 0
mov [brighten_red + 2], byte al

; go_green:
shr bl, 5 ; darken every 256 frames
mov [darken_green + 2], byte bl

mov cx, 0xFF ; reset loop for palette generation
jmp palette ; jump to palette generation, then draw another frame
- SI points somewhere in the MIDI commands (SI +/- an offset can be cheaper than using a label)
- “brighten_red” and “darken_green” are two labels in the palette code, controlling the amount of colors added,
- I use the time counter BL both for increasing the volume, and progressively changing the colors.
Also note how I need to regenerate the whole palette on each frame, which obviously consume a fair amount of CPU cycles.
Finding notes
I used two MIDI channels, as usual channel 0 (instrument) and channel 9 (drums).
I couldn’t quickly find a satisfying bass pattern, so instead I used a MIDI “sound effect” instrument that looped indefinitely once triggered.
Since a note is played on both channels every frame, the trick was simply to mute the volume on channel 0 on first frame to avoid ‘stacking’ the notes.
For drums, I already had a progressively increasing volume, all I needed was an interesting pattern.
This time I experimented with logical AND based on the frame counter to trigger either a snare, a kick, or silence :
mov bx, bp ; copy the time counter stored in BP into BX

cmp bx, 256
jle kick ; don't start the snare until the 256th frame

mov al, 40 ; snare is MIDI note 40
test bx, 0x0F ; play snare every time the frame counter AND 0x0F = 0, i.e. every 16 frames
jz drum_note

kick:
mov al, 36 ; kick is MIDI note 36
test bx, 0x03 ; play kick every 4 frames
jz drum_note

salc ; xor al, al : set the MIDI note to 0 (silence)

drum_note:
mov [si + 1], al ; update drum note directly in the MIDI commands

; play all 8 MIDI commands
mov cl, 8
rep outsb
I tried probably close to a hundred snare/kick patterns by hand, until finally deciding on the final one hours before the deadline.
Still, this technique was simpler and cheaper than the multiple branchs approach I tried with Mana Fortress, just more tedious to code with no better way than listening to each pattern one by one.
I wished I had more bytes to find a better rhythmic or melodic variations to get along with the graphics.
I also noticed the MIDI notes sounded far better on the Revision compo machine than on my PCs, which was a nice bonus. These drums definitely screams metal and the original Doom to me :)
Last minute optimization
As usual the intro still weighted more than 256 bytes hours before the deadline ; this time one of the tricks that saved it was related to the symmetry computations :
mov cl, 7
sub cl, bl
mov bl, cl ; bl = 7 - bl
This code is similar to the one used in Mana Fortress : we want to replace a series of indices like this : 0 1 2 3 4 5 6 7 to the symmetric : 7 6 5 4 3 2 1 0 ; so we compute 7 - X instead.
Turns out we can use NEG instead, saving one whole byte and a register :
neg bl
add bl, 7
This effectively compute -X + 7, instead of 7 - X.
This NEG use, combined with other tricks, reduced the intro size to a satisfying 253 bytes.
I named it “Inner Rage” since I liked the contrast between the calm waves at the start shifting to the “boiling blood” effect.
Last minute glitch
After merging the two scenes, I found out the XOR’ed blue of the first scene created some subtle yellow accents once in the white/red scene, so I decided to keep it.
What I didn’t found out until the end of development was that after about 50 seconds of running time, the palette computation overflowed, the white/red gradient disappeared, replaced by completely glitched colors that kept changing until being stuck on the old teal version (?).
I didn’t have time to investigate exactly why that happened, and the effect was cool and unexpected, so of course I kept it that way and pretended that was planned all along.
The final result :
Conclusion
Overall I’m much more satisfied with how this intro turned out compared to last year, even though I had some luck finding the ‘bubble’ pattern early on and didn’t follow the original plan.
I really liked the visuals this time, and massively improved the code compared to Mana Fortress, so I consider it my best intro yet from the technical side.
As always, I’m unsure I will be able to equal or surpass this in the future :)
Revision 2026
You can find out all 256b intro competitors of this year here and the intro files here.
I did not know what to expect, but the overall intro level was stellar, and probably the highest-level competition since the re-introduction of the 256b compo at Revision 2019.
It was really cool finding everyone trying their best this year, even outside the 256b compo.
Greetings
Greetings to :
- Gub for helping with intro-saving optimizations at the last minute (as usual)
- Coralune for seeing way too many drafts of these effects without being bored to death
- all the people that didn’t quite know what’s a “256 bytes intro”, but still gave useful feedback and support anyway
- sizecoding.org and all its helpful tricks when it’s past midnight and you still can’t see how to save those pesky bytes
- Ctrl-Alt-Test, Razor1911, all sizecoders